I challenged myself for a solo travel adventure to India and after the trip, I can confidently say that India is the craziest, yet most colorful country there is! My advice? Don’t take others’ words for it—check it out for yourself! Especially, if you don’t want to miss your chance to see One of the 7 World Wonders, Taj Mahal (spoil alert, it’s magnificent)! But just before you start packing, you must apply and obtain your Indian E-Visa first. Don’t worry, obtaining one is very easy as it can be done 100% online. Follow the 6 simple steps below as you start your adventures to a Trip Of A Lifetime in India!

Hover this photo then click on the save button to save it on Pinterest for later!

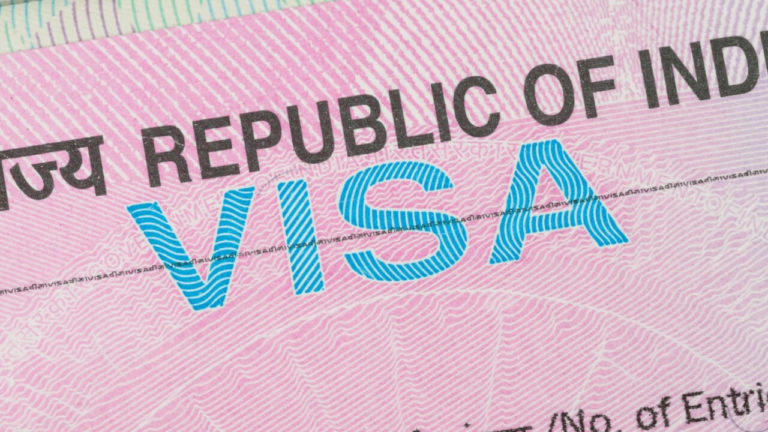
I. HOW TO APPLY FOR AN INDIAN E-TOURIST VISA ONLINE (STEP-BY-STEP GUIDE)
STEP 1: Determine the type of Visa you need to apply for.
Depending on your purpose, there are different types of Indian Visas you can apply for, (such as business e-visa, medical e-visa, etc.).
This guide is for those applying for an INDIAN E-TOURIST VISA, only if the purpose of visit is tourism/recreation (sightseeing/tours) or visiting to see friends/relatives who live in India. If this fits your purpose of visit, then now you have to determine if you are eligible for an Indian E-Visa, READ THIS: INDIAN E-VISA ELIGIBILITY. If you are a Philippine Passport Holder, I have a more specific guide for you, READ THIS: INDIAN E-VISA GUIDE for Filipinos
If you have a different situation or intention of visit, it’s best to directly contact the Bureau of Immigration of India for more information.
STEP 2: Prepare for the Indian E-Visa Requirements.
Indian E-Visa Requirements List;
1. Scanned Passport’s Bio Page and Emergency Page
- Passport must have a signature and;
- Must have at least 6 months’ remaining validity prior to your intended travel date.
2. Scanned Colored Passport-sized Photo
- Photo size: 4.5cm x 4.5cm (against white background).
3. Indian E-Visa Fee
The Indian E-Visa fee varies depending on which website you submitted your application (including the number of entries and validity of E-Visa you selected. It’s basically how and where you obtain your E-Visa.
NOTE: Prepare certain details/information of your travel in India such as intended entry and exit dates, name of air/seaport (point of entry), your hotels address, and contact number in India.
STEP 3: Apply for an Indian E-Visa Online.
How to apply for an Indian E-Visa Online
Go to the Indian Visa Online website.
- Click on “e-Visa Application” and;
- Fill out a short form (and make sure to tick e-Tourist Visa, then the number of entries you prefer before clicking “Continue“. On the next page;
- Fill out the long form and make sure all details are correct, specially for passport details (and email because that’s where you will receive your E-Visa).
NOTE: For the question regarding your “References in India”, if you don’t have any, then that means, hotel’s information that you will be staying in India. Paid hotel booking is NOT a requirement, but you can Reserve one online (for FREE) through Agoda.com with a REFUNDABLE option if you cancel it a day before your intended stay. That way, you can also fill up the exact address and contact information needed on the application form.
TIP! The ‘Save’ button is meant to record all the details that you have already entered, so you can continue later on. But, for some apparent reasons, it was not working during my time, even the link that they sent me for the ‘pay later’ option, was prompting me to fill out the form All Over Again! Hopefully, you won’t go through the same thing, otherwise I suggest to finish everything in one go, including the payment.
STEP 4: Pay the Visa Fee.
Select either SBI or Axis whichever you prefer, (mine was SBI).
- For SBI, the next page will prompt you to pay via Credit Card, Debit Card or PayPal.
- Credit Card: Visa and MasterCard are accepted.
- Debit Card: Visa, MasterCard, and Maestro are accepted.
NOTE: Once Payment is done, you will receive a confirmation with an application ID.
STEP 5: Wait for your E-Visa application results.
According to the email I received; E-Visa application may take up to 72 hours, but I actually got mine in just 32 hours. Yay!
TIP! If approved, it’s always a best practice to check and make sure all information on your E-Visa is correct to avoid complications in your travels. Good Luck!
STEP 6: Print your E-Visa.
Printed copy of your Indian E-Visa is needed by the Immigration upon entry in India.

They will also stamp your E-Visa on your passport, so you won’t need the printed copy after that.
That’s it! This is one of the simplest Visa applications I have ever experienced so far. So, you shouldn’t have any issues in getting your Indian E-Visa, but if you do, it’s best to contact directly the E-Visa Support Center to this email: indiatvoa@gov.in
I hope you find this helpful in getting your Visa. If you have other tips, suggestions or you have gone through a different Visa procedure, please share your experience in the comment section to help out others. Let’s make this place be the source of useful information and a start of meaningful conversations that gives value to others! ?
Klook.comII. INDIAN E-VISA FREQUENTLY ASKED QUESTIONS (FAQs)
1. Is Travel Insurance required to apply for an Indian Tourist Visa?
NO. It’s not part of the Indian Visa Requirements. However once your Visa is approved, I strongly recommend getting one because while India is generally safe to travel, remember that you can’t really eliminate the risk, but you can always add protection! That said, here’s my recommendations;
- For the best “budget-friendly travel insurance”: SafetyWings
- For the best “travel insurance coverage”: World’s Nomads
2. How much is the Indian E-Visa fee?
It depends on many different factors. 1.) What passport you hold, 2.) The Number of Entries of an E-Visa you applied for; 3.) Duration of stay in India 4.) Validity. Plus, A Bank Charge of up to 2.5% of the total value of your E-Visa.
In my case, I hold a Philippine Passport and I applied for 1yr Multiple-Entry E-Visa, I paid 40USD + 1.75USD bank charge = 41.75USD.
The Visa fee for most countries are normally around $40 and above, except for the Citizens of the following countries as follows:
- FREE: Argentina, Cook Islands, Fiji, Jamaica, Kiribati, Marshall Islands, Mauritius, Micronesia, Nauru, Niue Island, Palau, Papua New Guinea, Samoa, Seychelles, Solomon Islands, South Africa, Tonga, Tuvalu, Uruguay, and Vanuatu.
- $25: Citizens of Japan, Singapore and Sri Lanka.
- $75: USA, UK, Russia, Ukraine, and Mozambique.
3. Is Indian E-Visa fee refundable?
Once payment is made, it’s no longer refundable regardless of the outcome (Approved/Denied/Withdrew).
4. Do I really need to apply online for an Indian E-Visa?
Online application is the easiest and fastest way to apply, but if you are entering India via Airports/Seaports not listed above, then you need to go to the nearest Indian Embassy and apply for an Indian Visa sticker stamp on your passport.
5. How long is the processing time for an Indian E-Visa?
It may take up to 72 hours, depending on the acknowledgement email you will receive. It should mention the estimated processing time, if not send an email to: indiatvoa@gov.in.
In my case, it only took 32 hours to get my E-Visa.
6. How early can I apply for an Indian E-Visa?
4 months to a year prior to your intended arrival to India, (but keep in mind that it might be very close to the expiry date) and the Validity of an E-Visa you applied for.
7. When is the best time to apply for an Indian E-Visa?
Two weeks to a month prior to your intended arrival to India is the ideal time to apply for an E-visa. Also, it’s always a best practice to allow ample time to avoid complications in your travels.
8. How long is the validity of an Indian E-Visa?
4 months to a 1 year. Again, depending on what you applied for, you will be asked to choose during your online application.
9. Is ‘show money’ required to apply for an Indian E-Visa?
No. It’s not part of the requirements. I and all the people I know who applied for Indian E-Tourist Visa were not asked to submit any financial documents, (but it’s best to have it handy if ever they ask for it).
10. How often can I apply for an Indian E-Visa?
Only twice a year. If you intend to visit India multiple times or you want to stay in India longer then, I suggest applying for Multiple-Entry with your desired duration of stay, so you won’t have to apply for an Indian E-Visa every single time.
11. Can I track my Indian E-Visa application?
Yes, on this link.
- Enter your application ID and passport number.